I had one of those moments where everything sounds simple until you actually sit down to do it.
I needed to create a video quickly.
Not something cinematic. Not something perfect.
Just something clean, presentable, and ready to publish.
But the problem wasn’t ideas. It was execution.
Every time I open a traditional video editor, I lose time figuring out the interface instead of actually creating. That’s when I decided to try WeVideo and see if it actually makes the process easier or just looks simple on the surface.
What I’m sharing here is not a theoretical guide.
This is exactly how I used it, step by step.

After logging in, I expected some kind of setup screen or configuration panel.
There wasn’t one.
I clicked on “Create,” and I was inside the editor almost instantly. That first interaction told me something important. This tool is not trying to teach you editing. It’s trying to remove the delay between opening the tool and starting your video.
That difference sounds small, but it changes the entire experience.
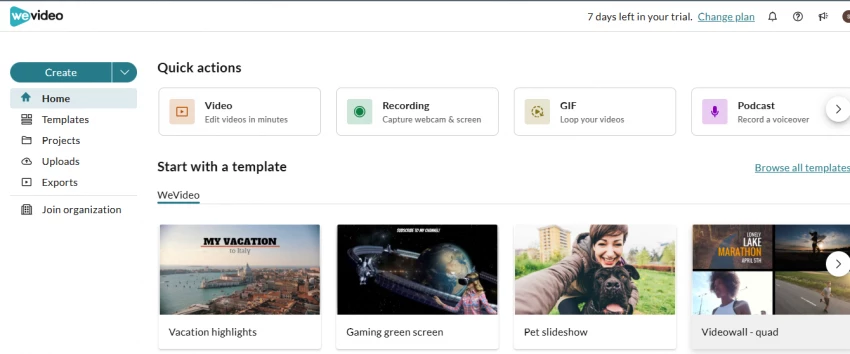
When I created my first project, I didn’t have to choose complex settings or formats. The platform assumes you’ll figure things out while working, not before.
That approach works especially well if you already know what you want to create but don’t want to spend time setting things up.
In my case, I had a rough idea of the video structure, so I could immediately move forward instead of getting stuck at the beginning.
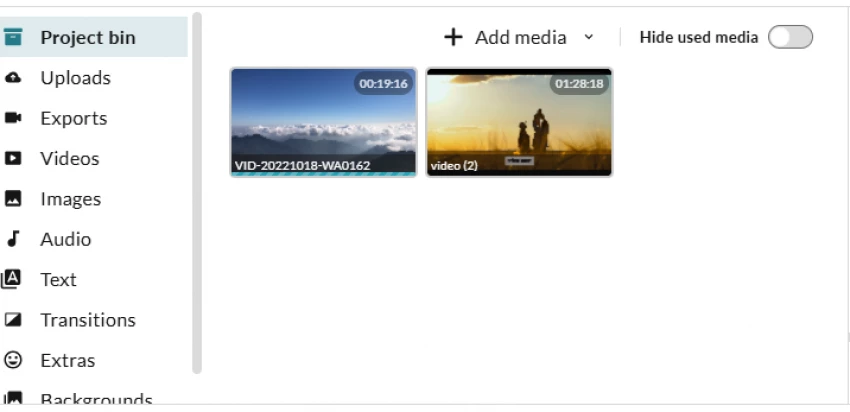
The next step was uploading my footage.
I added a mix of video clips, a few images, and some audio. The process felt direct. No unnecessary interruptions, no confusing file handling.
What stood out here was how quickly I could move from uploading to actually building something.
Instead of organizing everything perfectly, I just dragged clips into the editor and started arranging them. That’s something many tools don’t encourage, but it makes a big difference when you’re trying to stay in a creative flow.
This is where I usually decide whether a tool is usable or frustrating.
As I started trimming clips, cutting unnecessary parts, and adjusting timing, I noticed that WeVideo doesn’t try to overwhelm you. It doesn’t give you ten different ways to do the same thing. It keeps things simple.
And because of that, I kept moving forward instead of stopping to figure things out.
The editing felt natural. Not advanced, but efficient.
If you’ve ever opened a complex editor and felt stuck within minutes, you’ll immediately understand the difference here.
At this point, I tested the recording feature just to see how it works.
I recorded my screen along with a quick voice explanation, and the result went directly into my timeline.
No exporting. No switching tools. No extra steps.
This is where I realized something important.
WeVideo is not just an editor. It’s trying to reduce the entire workflow into one place.
For tutorials, demos, or educational content, this saves a lot of time.
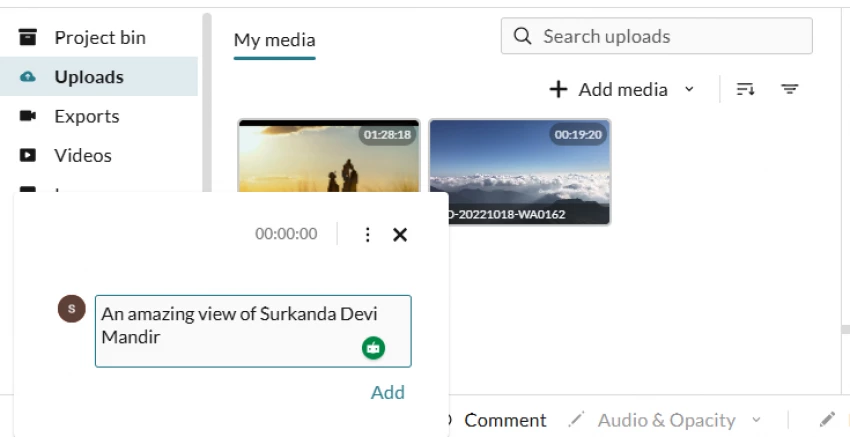
Once the structure of my video was ready, I moved into refining it.
I added text overlays, adjusted visuals slightly, and included background music. The controls were simple enough that I didn’t need to pause and think about how to do things.
This is where many tools either shine or fail. Some give too many options. Others feel too limited.
WeVideo sits somewhere in between. It gives enough control to make the video look finished, without slowing you down.
I made sure to test subtitles properly.
Because realistically, most people today watch videos without sound.
Generating subtitles here was quick, and the impact on the final video was immediate. It made the content feel more professional and easier to consume.
This is one of those features that doesn’t feel important until you see the difference it makes.
Finally, I exported the video.
This is usually where tools introduce complexity, but here it stayed consistent. I selected the output quality, exported the video, and it was done.
No confusion. No technical barrier.
That consistency from start to finish is what defines the entire experience.
After going through the entire workflow myself, from starting a project to exporting the final video, a few things became very clear. Some parts genuinely make the process faster and smoother, while a few limitations show up once you push beyond basic editing needs. Instead of over-explaining, here’s a straightforward breakdown based on real usage.
| Pros | Cons |
| Extremely easy to start, no learning curve needed | Lacks advanced editing control for professional-level work |
| Browser-based, so no heavy software installation required | Performance can depend on internet speed |
| Smooth and intuitive timeline editing experience | Limited flexibility compared to tools like Premiere Pro |
| Built-in screen and webcam recording saves time | Some features are locked behind paid plans |
| Quick subtitle generation improves content quality | Not ideal for complex cinematic or VFX-heavy projects |
| Fast export process without technical complications | Pricing may not suit occasional users |
After using the tool myself, I didn’t want to rely only on my own experience.
So I checked what others were saying.
On Trustpilot, I noticed that some users appreciate the simplicity, while others mention issues related to performance or expectations. The pattern was clear. People who expect a lightweight tool are satisfied. Those expecting advanced editing often feel limited.
On G2, the feedback felt more structured. Many users highlight ease of use, especially for teams, educators, and beginners.
On Quora, the comparison with professional software comes up frequently. The answer is consistent. It’s not meant to compete at that level.
Even raw discussions like https://www.reddit.com/r/VideoEditing/comments/602h4b/dear_wevideo/ show that expectations shape the experience. If you expect simplicity, it works. If you expect power, it feels limited.
Before concluding, I checked the pricing.
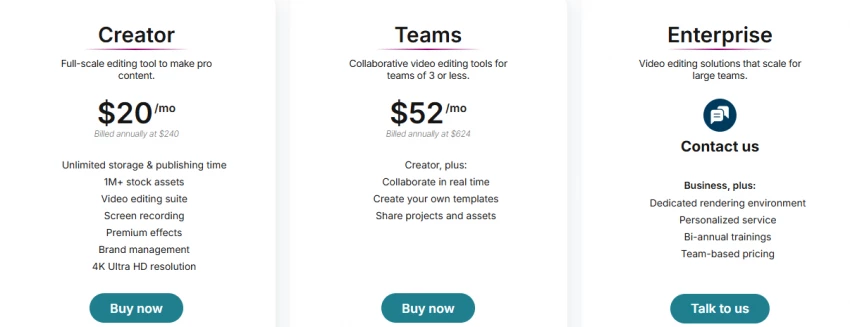
The structure is clearly designed for regular creators and teams.
If you’re creating videos consistently, the pricing makes sense.
If you’re editing occasionally, you need to think about whether it justifies the cost.
After using all these tools, the difference becomes clear when you focus on just two things, how powerful the editing is and how fast you can actually get a video out.
| Tool | Editing Level | Speed of Output |
| WeVideo | Moderate (clean, simple editing) | Fast |
| CapCut | Moderate to High (more flexible edits) | Very Fast |
| Runway | High (AI-driven advanced workflows) | Medium |
| Pika | Low (limited editing, more generation) | Fast |
This is the simplest way to understand it.
WeVideo helps you finish videos easily.
CapCut helps you edit faster with more flexibility.
Runway helps you create with AI depth.
Pika helps you generate visuals quickly.
After going through the full workflow, here’s what stands out.
WeVideo is not trying to be everything.
It is trying to remove friction.
And it does that well.
It helps you start faster, edit without confusion, and finish without delays.
If your goal is speed and consistency, it works.
If your goal is deep creative control, you’ll feel its limits.
Ease of Use: 9/10
Features: 7/10
Performance: 7.5/10
Beginner Experience: 9/10
Overall Rating: 8.3/10
Most creators don’t need more features.
They need fewer obstacles.
That’s exactly what WeVideo removes.
And that’s why it works.
Be the first to post comment!

Why People Start Looking Beyond Janitor AIJanitor AI built its popularity on fre...
Sakshi Dhingra8 hours ago
The Moment That Made Me Try Both ToolsThere’s a point where creating videos stop...
Sakshi Dhingra9 hours ago
There was a time when editing a video meant sitting in front of a timeline for h...
Sakshi Dhingra2 days ago

In today’s fast-paced digital life, conversations have become shorter, faster, a...
Sakshi Dhingra2 days ago

Why most comparisons get this wrongIf you just look at features, Promptchan AI a...
Sakshi Dhingra2 days ago

There’s a phase every writer eventually reaches where effort stops being the pro...
Sakshi Dhingra3 days ago